Arduino Weather Station: The Essential Guide for Your First IoT Project
📡 Antenna Length Calculator
⚖️ WARNING: This ‘Antenna Length’ tool provides estimations. Always check your wiring with power off.
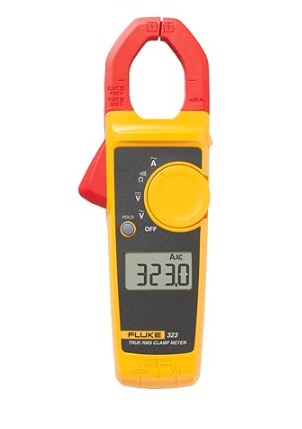
Fluke 323 Digital Clamp Meter (True RMS, 400A AC)
🛠️ The essential tool for this project.
🌈 LED Strip Sizing (WS2812B)
⚖️ WARNING: This ‘LED Calculator’ tool provides estimations based on standard mathematical models. Electrotuto cannot be held responsible for calculation errors or hardware consequences related to its use. Always check your parameters manually.
Building an Arduino weather station is one of the most rewarding and comprehensive projects for getting started with DIY electronics. Whether you want to monitor your garden’s temperature, your greenhouse’s humidity, or simply learn how to handle digital sensors, this guide will lead you step-by-step through creating a professional setup.
Why the Arduino weather station is the ideal project?
The Arduino weather station covers all aspects of embedded development: reading analog and digital signals, using software libraries, and displaying data on an LCD screen. It is an evolving project: you can start with a simple thermometer and end up with a fully connected Wi-Fi system.

1. Necessary hardware for your Arduino weather station
To succeed with your Arduino weather station, you must select quality components. Here is the list of essentials:
- Arduino Uno R3 (or Nano for a compact size).
- DHT11 sensor (temperature and humidity) or the DHT22 for increased accuracy.
- I2C module for LCD 1602: it allows connecting the display with only 4 wires instead of 12.
- A breadboard and connection cables (Jumpers).
2. Wiring diagram for the Arduino weather station
Wiring an Arduino weather station is accessible even without deep knowledge. The DHT11 sensor connects to 3 pins: 5V, GND, and a data pin (e.g., Pin 2). The LCD display, thanks to the I2C module, connects to the analog ports A4 (SDA) and A5 (SCL) of the Arduino Uno.
3. Source code and programming
The code for your Arduino weather station relies on two major libraries: Adafruit’s DHT sensor library and LiquidCrystal I2C. These tools greatly simplify programming by handling complex communication protocols for you. Once the code is uploaded, your station will instantly display readings on the screen.
4. Evolutions: Towards IoT and home automation
To transform your Arduino weather station into a truly connected object, you can use an ESP32. This will allow you to send readings to a central server like Home Assistant to create historical graphs or trigger alerts on your phone.
Conclusion
The Arduino weather station is more than just a gadget; it’s a gateway to the world of embedded systems. By building your own tools, you gain freedom and technical skills. To power your outdoor stations far from an outlet, don’t forget to check our guide on solar lithium batteries.
To deepen your knowledge of microcontrollers, visit the official Arduino website.
Note: To deepen your technical knowledge, consult our guide on Ohm’s Law.