How to test an electric motor with a multimeter? (Complete Guide 2026)

⚡ Quick Answer
Testing an electric motor with a multimeter allows you to verify winding continuity and insulation to ground. This is the fundamental step for diagnosing whether a motor is open-circuited, short-circuited, or burnt out before considering a replacement.
Note: This guide was fully revised in April 2026 to reflect the latest standards and technological developments.

Why test your motor? Whether it’s due to a suspicious bearing noise, an unexpected trip during production, or a characteristic “burning” smell, knowing how to test an electric motor with a multimeter is a core skill for maintenance technicians. An incorrect diagnosis can waste hours of production or lead to replacing a machine that is still functional.
Imperative safety reminder: Before opening the terminal box, ensure that the lockout-tagout procedure is complete. Use a Voltage Absence Tester (VAT) to confirm that the power is actually cut off. Never trust the disconnector alone.
What tools should you use to diagnose a motor?
The Multimeter: Your first ally
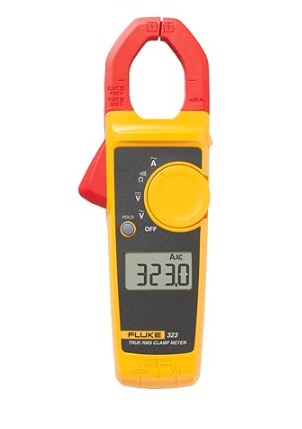
For a reliable diagnosis, forget entry-level devices. A device like the Fluke 179 or Chauvin Arnoux CA 5273 is recommended for its precision in measuring low resistance. We will primarily use the Ohmmeter mode (Ω) to check the continuity of the windings.
The Megohmmeter: The truth test
A multimeter uses a 9V battery, which is insufficient for detecting an insulation fault that only manifests under load. A megohmmeter injects a voltage of 500V or 1000V to test the dielectric resistance of the insulators. If you don’t have one, the multimeter remains an excellent first step.
How to perform a visual and mechanical inspection?
Before taking out the test leads, look and listen. Unreadable nameplate? Take a photo and adjust the contrast to read the current (In) and power factor (cos φ).
Checking the bearings
Uncouple the motor from its load if possible. Turn the shaft by hand. If there is a stiff spot, a metallic grinding noise, or significant radial play, the problem is mechanical. There’s no point in looking for an electrical fault until the rotor turns freely.
What are the steps for a three-phase electrical test?
Open the terminal box. Remove the coupling links to isolate the three windings (U, V, W). It is a classic mistake to measure with the links in place, which completely skews the results.
Measuring phase balance
Measure the resistance between U1-U2, V1-V2, and W1-W2. You should find very close values (generally between 1 and 15 Ohms depending on the power). A deviation of more than 5% between phases often indicates a partial short circuit between turns.
Insulation test (Motor “shorted to ground”)
Place one test lead on the ground terminal (or the scratched metal frame) and the other successively on U1, V1, and W1. The multimeter should display “O.L” or a resistance greater than 20 MΩ. If you read a low value, the motor has an insulation fault: danger of electrocution and a guaranteed trip.
How to test a single-phase motor and its capacitor?
On a 230V motor, you will find two windings: the main and the auxiliary. The auxiliary winding generally has a higher resistance.
The start capacitor
If the motor “hums” but only starts with manual assistance, the capacitor is dead. Use the capacitance function of your multimeter. If the measured value is more than 10% lower than the rated value (e.g., 18μF instead of 20μF), replace it without hesitation.
Conclusion: Repair or Replace?
If a winding is open (O.L) or dead-shorted (0 Ω), the motor must be rewound or replaced. For small motors (less than 7.5 kW), replacement is often more economical. To protect your new investment, don’t forget to properly set your thermal relay.
As an Amazon Associate, I earn from qualifying purchases.
Learn more: To master the basics of electronics, don’t miss our guide on Ohm’s Law.
💡 Frequently Asked Questions (FAQ)
Why is my three-phase motor overheating?
This can be caused by phase imbalance, mechanical overload, incorrect coupling (Star instead of Delta), or a ventilation failure.
Can you test a motor without disconnecting it?
It is imperative to remove the coupling links to isolate each winding. Otherwise, you will be measuring the combined resistance, which completely skews the diagnosis.